
I love Vue and Vite — what a wonderful development experience. But I love Python for its Tornado, SQLAlchemy and so much more. So here is a tip of the iceberg — this demonstrates the nexus along with outrageous misuse of tools and bad engineering — where is the linting, formating, testing, documentation and the rest? If asked I can drum up the pylint, axblack, pytest, sphinx, but I won't use rest; rpcs for me.
To start we create a Makefile — its steps are simple if you don't have Make:
Makefile
setup:
    if which python3 && [ ! -d venv ] ; then python3 -m venv venv ; fi
    source venv/bin/activate \
        && python -m pip install -q -U pip \
        && pip install nodeenv tornado \
        && if [ ! -d nenv ] ; then nodeenv nenv; fi
Then call your Makefile's setup function: make setup
Create a Python package called chat and add modules to it called main.py and websocket.py. To the package add a directory called static which will house our web static files.
In bash you could run:
mkdir chat
touch chat/__init__.py
touch chat/main.py
touch chat/websocket.py
mkdir chat/static
Main will hold our tornado configuration and websocket define our websocket handler. Tornado instantiates RequestHandler classes to handler each request. We'll use two handlers: Websocket and StaticFileHandler.
websocket.py
""" our websocket handler """
import logging
from tornado.websocket import WebSocketHandler

log = logging.getLogger(__name__)

class Websocket(WebSocketHandler):
    """ a websocket handler that broadcasts to all clients """

    clients = []

    def check_origin(self, origin):
        """ in development allow ws from anywhere """
        if self.settings.get('debug', False):
            return True
        return super().check_origin(origin)

    def open(self, *args, **kwargs):
        """ we connected """
        log.info('WebSocket opened')
        self.clients.append(self)

    def on_close(self):
        """ we're done """
        if self in self.clients:
            self.clients.remove(self)
        log.info('WebSocket closed')

    def on_message(self, message):
        """ we've said something, tell everyone """
        for client in self.clients:
            client.write_message(message)
Our specialisation adds a class property clients to which each request adds to and removes from themselves. This allows us to broadcast on receipt of a message. We check the debug setting to see if we allow request from other origins.
main.py
""" our entry point """
import logging
import tornado.ioloop
from tornado.web import Application
from tornado.options import define, options, parse_command_line
from .websocket import Websocket

log = logging.getLogger(__name__)

define('debug', type=bool, default=False, help='auto reload')
define('port', type=int, default=8080, help='port to listen on')

def make_app():
    """ make an application """
    return Application(
        [
            (r'/ws', Websocket),
            (
                r'/(.*)',
                tornado.web.StaticFileHandler,
                {'path': 'chat/static', 'default_filename': 'index.html'},
            ),
        ],
        debug=options.debug,
    )

def main():
    """ parse command line, make and start """
    tornado.options.parse_command_line()
    app = make_app()
    app.listen(options.port)
    log.info('listening on port: %s', options.port)
    if options.debug:
        log.warning('running in debug mode')
    tornado.ioloop.IOLoop.current().start()

if __name__ == '__main__':
    main()
Tornado provides an args parser and with it we define two options: port and debug. We then make an app by defining routes and settings.
So now we have a tornado application we can run it from the command line by activating our virtual environment and calling our main module:
. venv/bin/activate
python -m chat.main --debug=true
First we need to activate our nodeenv and then call Vite to create an app.
. nenv/bin/activate
npm init @vitejs/app client
This will ask to install Vite and ask what flavour of app you want. We'll choose regular Vue. It will then instruct you to move to the client directory and run npm install and npm run dev. Do so. Now on port 3000 you should find your Vite Vue3 app.
Let's add a Websocket client:
websocket.js
import { reactive } from 'vue'

export default {
    install: (app, options) => {
        const ws = new WebSocket("ws://localhost:8080/ws");
        ws.transcript = reactive([])
        ws.onmessage = function (evt) {
            ws.transcript.push(evt.data)
        };
        app.config.globalProperties.$ws = ws
    }
}
We create a WebSocket back to our tornado app. We also have a transcript attribute that is reactive. We install ourselves as a plugin, giving global access to $ws in any vue component.
main.js
import { createApp } from 'vue'
import App from './App.vue'
import ws from './websocket.js'

const app = createApp(App)
app.use(ws)
app.mount('#app')
We add our plugin to the app with app.use(ws).
Then we change components/HelloWorld.vue to use our plugin:
HelloWorld.vue
<template>
<div class="page">
    <div class="transcript">
        <div class="line" v-for="line in $ws.transcript">
            {{ line }}
        </div>
    </div>
    <form @submit.prevent="say">
        <input v-model="name" placeholder="your name" size="10">
        <input v-model="something" placeholder="say something" size="40">
        <input type="submit" value="Say">
    </form>
</div>
</template>

<script>
export default {
    data() {
        return {
            name: "anon",
            something: ""
        }
    },
    methods: {
        say() {
            this.$ws.send(`${this.name} said: ${this.something}`)
            this.something = ""
        }
    }
}
</script>

<style scoped>
.page {
    display: flex;
    flex-direction: column;
}
.form {
    display: flex;
    flex-direction: row;
}
.transcript {
    display: flex;
    flex-direction: column;
}
</style>
Yes, I know I did not use the composition api. This is still readable and as I get used to the composition api I will move over.
You should be able to see it on: http://localhost:3000
Next, we'll build our app and access it via port 8080. First, we need to edit the client/package.json to tell Vite where to put the built files.
"build": "vite build --outDir=../chat/static/ --emptyOutDir",
Then run the build command in a new terminal:
. nenv/bin/activate
cd client
npm run build
Now you should be able to point your browser to: http://localhost:8080
Tornado is serving both the client and the websocket. Check out the size of the client! For me it is 59k! (the size of the static directory).
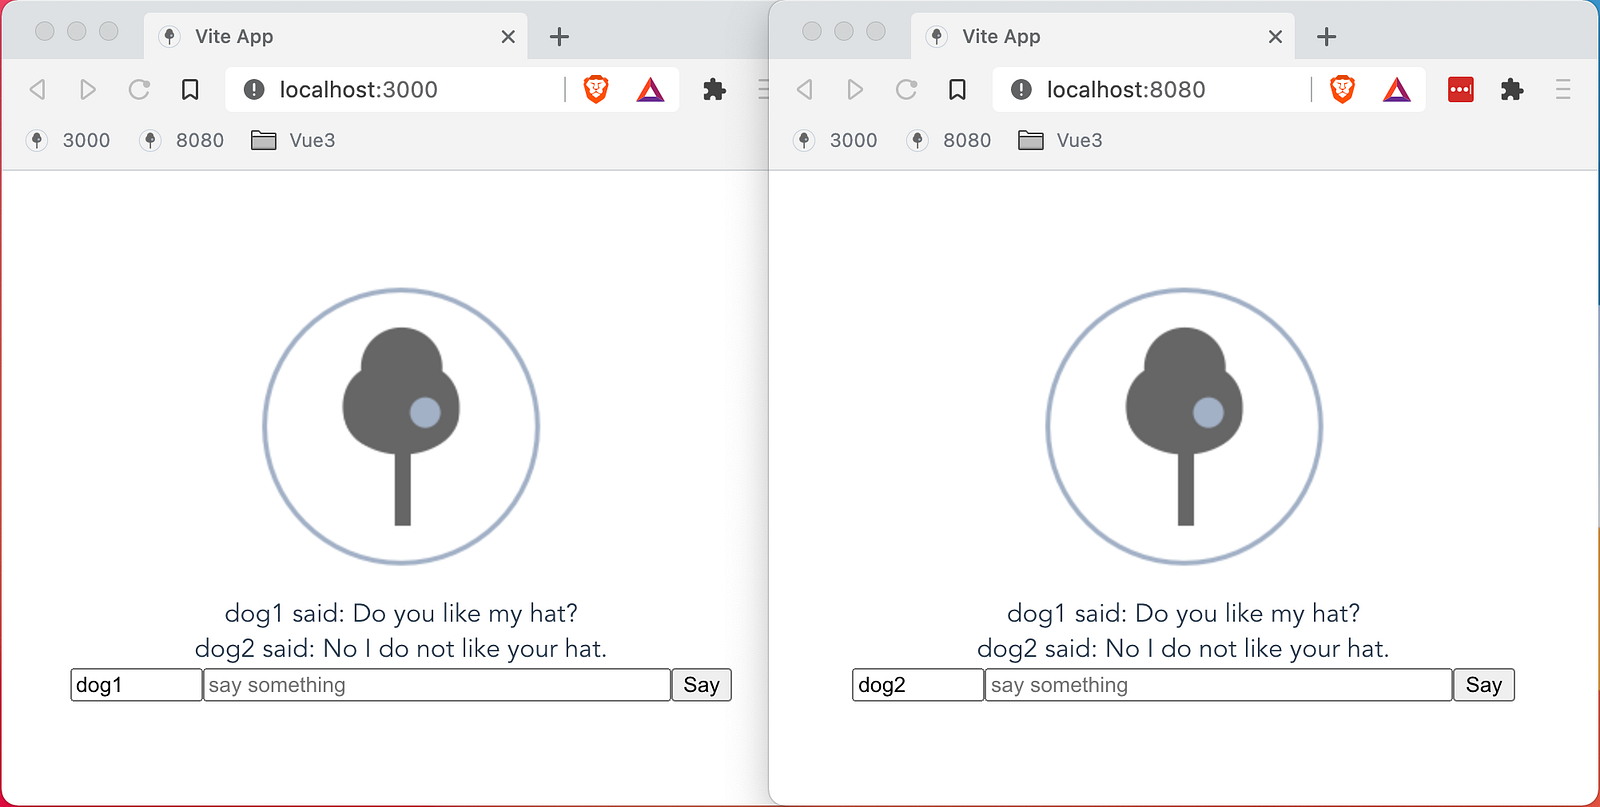
If you are still running Vite on port 3000, using two browser pages, you can chat between Vite and Tornado, dev and built!
Placed in a docker container, with multi-stage build, will result in a 48MB image!
This is just the beginning. On from here, we find docker containers, database access through SQLAlchemy, Redis to support multiprocess communication, remote procedure calls to provide views, caching for search and so much more, all made possible by a simple ioloop running testable functions.
The project is available at: https://github.com/blueshed/chat
The next article is available at: Python Realtime Chat Engineered.